


My LG Velvet 5G Won’t Turn On, What to Do?
First, Connect Your Phone to Charger
When your LG Velvet 5G is not switching on, the first thing you should do is to keep your phone on charging for at least 15-20 minutes. Now try to power on your phone and check if it is turning ON or not.
If your LG Velvet 5G is still not switching on, then we recommend checking the below-mentioned remaining methods.
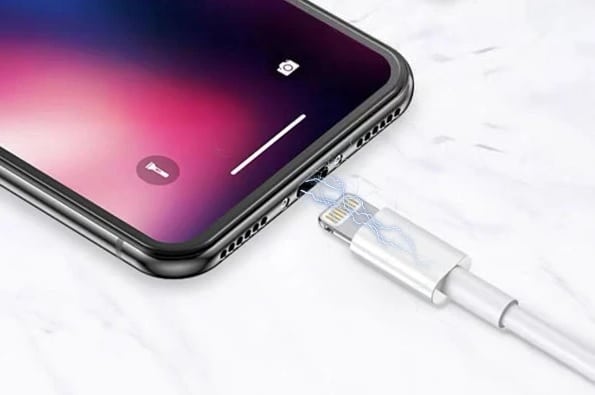
Check Charging Cable / Charging Port [ LG Velvet 5G not switching on ]
In many of the LG Velvet 5G is not switching on related cases, the problem was more on the charging cable than on the phone. Even in the case of cable, there can be a variety of reasons why you are facing the problem like:
Broken cable: Even the original cables providing in the packing is known to have a certain breaking point. If the cable is damaged, it is recommended that you change it immediately.
Cable not supported: Another common problem with the cable comes up when you have recently changed it but it is not supported by your LG Velvet 5G. It is always recommended to use the original cables supplied by the smartphone company.
Cable not fitting: The charger which falling off the port is a commonly seen thing these days. This might happen in the case of original cables after a long time of usage. So, if the charging cable of your LG Velvet 5G is not fitting properly anymore it is better to change it as soon as possible.
Debris in Charge Port: Use a (dry) toothbrush, toothpick or small metal or plastic straight tweezers and gently brush out your phones charging port to look for any deposits inside. A toothbrush works well because toothbrush bristles do not damage any internal phone parts and also does not conduct electricity. If you’re using metal tweezers, be aware of shorting components inside your charge port. With toothpicks and plastic tweezers, ensure they are good quality and don’t break off inside causing more issues. Cleaning the area and port with a moist alcohol pad can help clear away debris as well, but be sure it’s dry before attempting any charging!
Check Charging Adapter / Power Block [ LG Velvet 5G not switching on ]
After the cable, the next thing which might cause LG Velvet 5G not switching on related problem could be the adapter itself. Similar to that of the charging cable the adapter might also run into problems at times. We might not understand the problem by looking at the visually. But if the cable has no issue, the next thing to check is the adapter itself.
The best way to find this out is simply by trying different adapters & check if your Android phone is switching on or not. It is always better to purchase the original supported adapter from the official brand itself.
Power Cycle [ LG Velvet 5G not switching on ]
If your phone has a removable battery, then remove your phone’s it and press & hold the power button for 30 seconds. This will cut the power from all the circuits in the phone. Now reinsert your battery and press the power button. After this, your phone should have to be in the switched-on condition.
If this method won’t work, then we suggest you try the Recovery mode method.
Boot Your Mobile into Recovery Mode (Recommended for ADVANCED USERS/L1 Technicians with Non-Removable Battery Phones).
Make sure your LG Velvet 5G is in a switched-off condition. Now press and hold the power button with the volume down key simultaneously until your phone is booted. If you have done it successfully then now you are in recovery mode, you can navigate to the options by volume up-down keys and select options by using the power button.
Now navigate to wipe cache partition by volume keys and select it by pressing the power button. Your phone’s cache will now be wiped and new cache files will be created. In the next step, you should turn off your phone for few seconds & then once again press the power button.
If unfortunately, your LG Velvet 5G is still not switching on then you should try the last method which we have mentioned below.
Factory Reset – Ensure You have a Current Backup Otherwise DO NOT DO THIS!
[Important note: All the data and files on your LG Velvet 5G will not be available after the factory reset. So, be sure you have a full device backup, especially of your important files before applying this method]
Once again you have to go in the Recovery mode. For that, Press and hold the power button with the volume down key simultaneously. After a few seconds, your phone will be in Recovery mode & now you have to navigate to the wipe data/factory reset option by using volume keys and select it by pressing the power button.
Now all the data on your mobile will be wiped clean. In the last step, keep your LG Velvet 5G in the switched-off condition for few seconds and then try to switch it on again.
We hope your problem is now solved and your phone turns on/off.
Weary of Attempting these solutions yourself? Completed the above and your LG Velvet 5G still is not turning on?
We can fix this power on/off issue in as little as 30mins, and many other issues on-site, with the LG Velvet 5G (G9)!

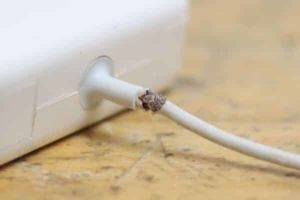 This is another very common reason why the iPhone stops charging due to the quality of the charging cable. If you are using an original charging cable, inspect your USB cable thoroughly and check for any existing damages on the cable; this could also be due to the poor condition of the cable or your cable being broken/damaged. Don’t be too surprised if you have bought a low-quality cable.